How to Keep a Worm Farm for Micro Fishing & Easily Bait Tiny Hooks
Finding the perfect bait for micro fishing, creek fishing, and even panfishing can be frustrating. Hunting down the right worm species can be a time-wasting hassle and store-bought bait isn’t always fresh or available. How many times have you bought a cardboard cup of goo? The solution? Raise your own fishing bait worms at home in a simple DIY worm bin.
With just a few plastic bins, vegetable scraps, and newspaper, you can create a low-maintenance worm farm that keeps a steady supply of fresh micro fishing bait—while also generating nutrient-rich compost for plants.
The Best Worms for Micro Fishing
Not all worms are ideal for home worm farming. Some, like Canadian Nightcrawlers, require refrigeration and won’t breed in a typical worm bin. Instead, choose worms that thrive in small indoor setups. There are a handful of worm species but these are our favorite worms.
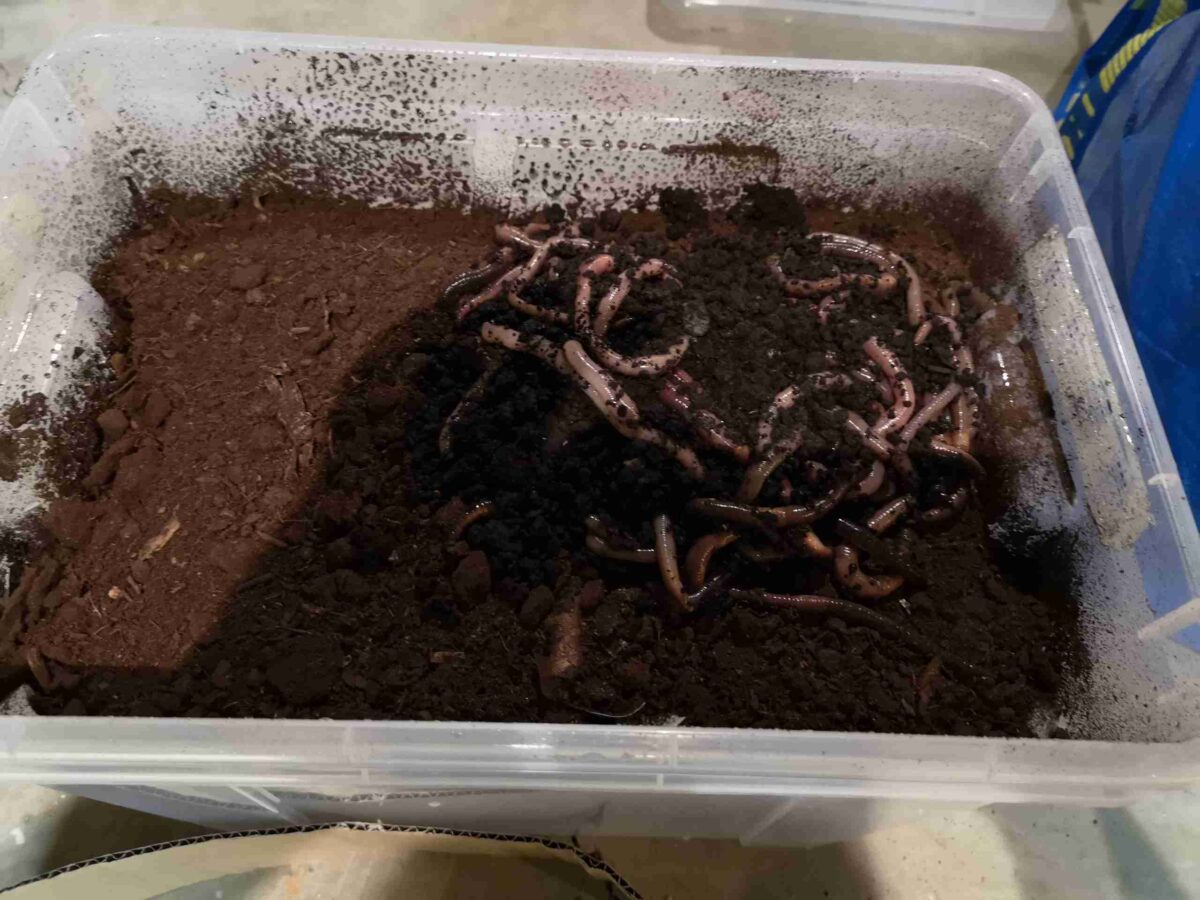
✔️ Louisiana Pinks – Small lively worms that work great on micro hooks.
✔️ Red Wigglers – Easy to breed, feed, and maintain, making them the best choice for home worm farms.
✔️ European Nightcrawlers – Slightly larger, but still manageable in a small worm bin for micro fishing bait. Good worms for bass and catfish, too!
Once you collect or purchase your worms a well-maintained bin ensures a steady supply of bait year-round.

DIY Worm Bin Setup: A 3-Bin System for Micro Fishing Bait
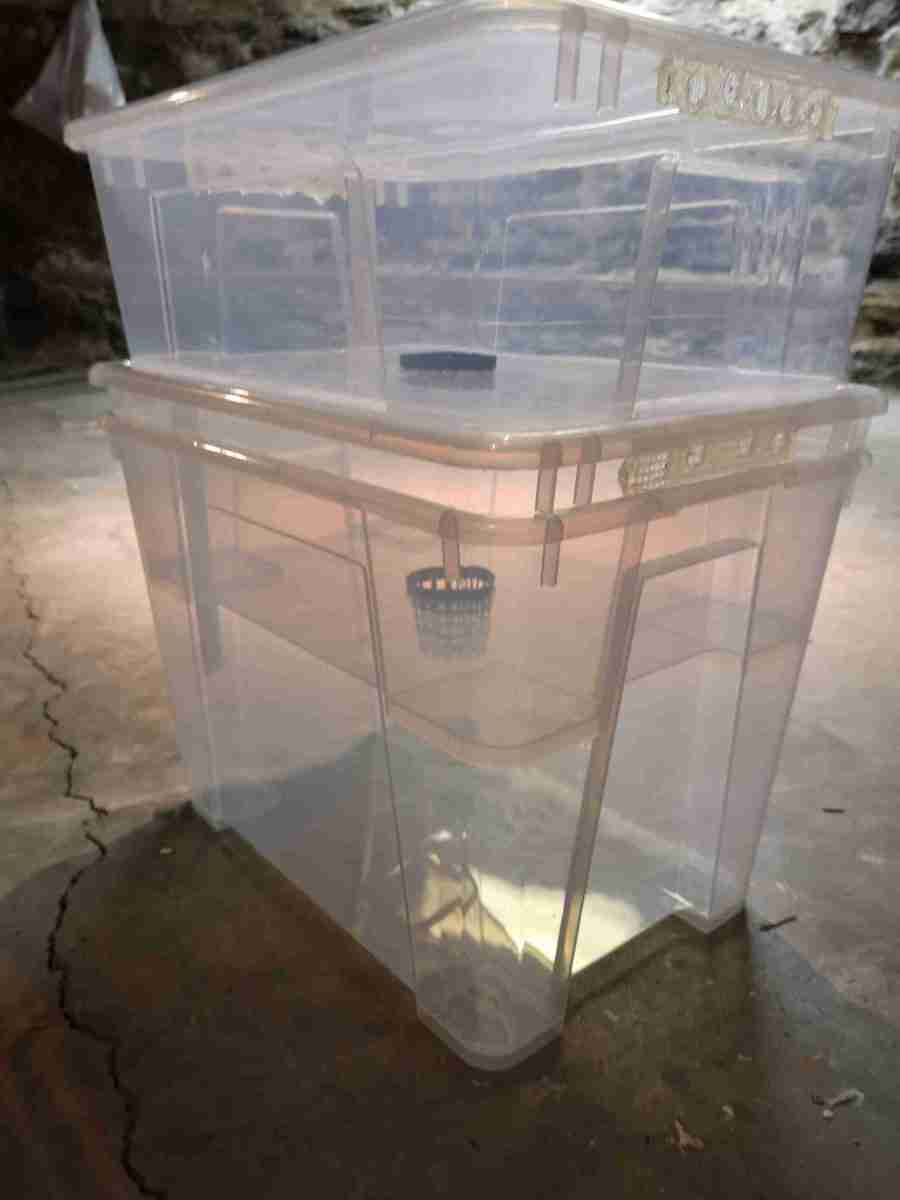
A three-bin stacking system is one of the most effective worm farms for micro fishing anglers. This design:
✔️ Separates worms from compost automatically.
✔️ Prevents moisture buildup & odor.
✔️ Makes harvesting worms easy for fishing trips.
What You’ll Need:
✔️ Three stackable plastic bins (like IKEA tubs or some similar storage containers) Even large butter tubs can work for Pinks.
✔️ A drill (for making ventilation and drainage holes).
✔️ Shredded newspaper or cardboard (acts as bedding).
✔️ Vegetable scraps (worm food).
✔️ A popsicle stick (for burying food & preventing flies).
✔️ A spray bottle or cup of water (to maintain moisture).
Building the Worm Bin: Step-by-Step Guide
1️⃣ Drill Holes for Drainage & Airflow
✔️ Top Bin (where worms usually live): Drill 1/4-inch holes in the bottom. Worms will migrate through these holes when food runs out.
✔️ Middle Bin: Same as the top bin—catches worm castings while allowing worms to move freely. Same holes as the top bin so you can swap them when time comes.
✔️ Bottom Bin: No holes—this collects excess liquid (“worm tea”).
2️⃣ Prepare the Bedding
✔️ Tear up some newspaper or cardboard strips and soak them in water until damp (but not dripping).
✔️ Loosely layer the bedding in the top bin about two inches deep to create a soft habitat for worms. Egg cartons made from paper also work well for this.
3️⃣ Add Worms & Food Scraps
✔️ Place worms on top of the bedding—they’ll naturally burrow in and settle down.
✔️ Start with small amounts of uncooked vegetable scraps—NO citrus, dairy, bread, or meat (which can cause odor & mold).
✔️ Popsicle Stick Trick: Keep a small popsicle stick inside the bin to cover food scraps with bedding—this keeps your finger clean and prevents flies & odors.
4️⃣ Cover & Maintain the Bin
✔️ Place a single sheet of damp newspaper over the top of food to keep worms near the surface. Spray it occasionally with a water mister.
✔️ Store the bin under a sink, in a basement, or in any cool, dark spot. Don’t let it get too hot or dry out.
✔️ If the bedding dries out mist it lightly with water. If it’s too wet add more shredded paper.
✔️ Over time the paper and food scraps become worm dirt which can be used for your plants.

How to Harvest Worms for Micro Fishing
After a few weeks or months your worm bin will have a lot of composted material and full of fresh micro fishing bait. To separate worms from castings:
✔️ Stop adding food to the top bin—worms will migrate to the fresher scraps.
✔️ Swap the middle bin with top bin—worms will migrate up to the fresher scraps. It’s best if the bin is full and the new top sits on the middle compost.
✔️ Add food to the new top bin—worms will migrate up to the fresher scraps as food runs out in the old middle bin.
✔️ Scoop out the worm-free compost for plants when the worms have left for the food rich top bin.
✔️ Repeat swapping the bins as needed—worms will keep going to the fresher scraps.
✔️ Gently collect your worms when needed and store them in a small container with moist bedding before heading out micro fishing.
How to Bait Tiny Hooks for Micro Fishing
Baiting tiny micro fishing hooks—especially ultra-small ones like The Art of Micro Fishing’s #30 pre-snelled micro hooks—can be tricky. Here’s the best way to prepare and bait worms for micro fishing success:
1️⃣ The Worm Pull Technique for #30 Hooks
✔️ Hold an earthworm firmly in one hand.
✔️ Insert the hook slightly into the end of the worm and pull it through. Use the snelled leader to gently pull.
✔️ A few tiny rings of the worm will tear off naturally staying perfectly sized on the hook.
This method keeps the worm alive & wiggling making it more attractive to fish. Continue to use the worm until it’s all gone.
Grab a Telescopic Micro Fishing Kit with Telescopic Rod and Micro Hooks for micro fishing, creek fishing, and small bream fishing too!
2️⃣ Preparing the Bait for Tiny Hooks
✔️ Use fingernails, scissors, or a small blade to cut tiny pieces of worm.
✔️ Hold the bait between your thumb and index finger and carefully thread the hook through.
✔️ If using soft baits (like bloodworms or maggots), pinch them gently and hook through the thickest part so they stay on.
3️⃣ Alternative Baits for Micro Fishing
If you don’t have worms, try:
✔️ Maggots or bloodworms – Great for catching picky little fish.
✔️ Tiny bread balls or dough – Attracts shiners & baitfish.
✔️ Insect larvae or ant eggs – A natural choice for micro species.
Mastering these baiting techniques will increase hookups and make catching even the smallest fish easier.
Why Keep a Worm Bin for Micro Fishing?
By maintaining a DIY fishing bait worm farm, you gain several benefits:
✔️ Always have fresh bait – No more last-minute bait shop runs.
✔️ Sustainable fishing – Raising your own worms reduces waste.
✔️ Bonus compost – Worm castings improve plant soil, while worm “tea” is a free liquid fertilizer.
✔️ Cost-effective – A one-time setup provides endless bait year-round.
✔️ Also have bait for creek fishing and panfishing! Worms can be used for panfish like bream, perch, trout, and many other types of fishing.
Start Your Own Worm Bin & Catch More Fish!
With just a few simple supplies, you can set up a worm farm that keeps fresh bait at your fingertips. Whether you’re targeting shiners, madtoms, or micro-sized suckers, having live worms ready makes a huge difference.
✅ Get the best micro hooks for fishing tiny baits!
BUY THE ART OF MICRO FISHING’S #30 HOOKS NOW! 🎣


